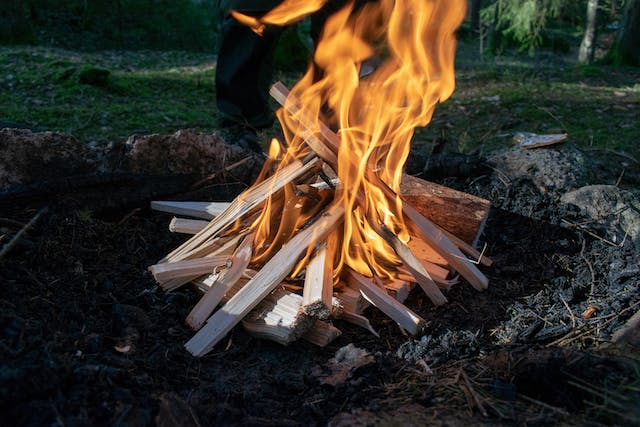
How to Make a Campfire Pit- Imagine this: a starry night, the scent of pine in the air, and the warmth of a crackling campfire. There’s something magical about gathering around a well-made campfire pit, creating memories with friends and family. If you’ve ever wondered how to bring that enchantment to your camping experience, you’re in for a treat. In this guide, we’ll explore the art of How to Make a Campfire pit – a sanctuary for stories, laughter, and the comforting glow of flickering flames.
Table of Contents
Here are some essential tools to help you build a campfire pit efficiently and safely:
Basic Digging & Shaping Tools: How to Make a Campfire Pit
- Shovel – For digging the pit and clearing debris.
- Pickaxe or Mattock – Useful for breaking up hard or rocky ground.
- Trowel – Handy for shaping and fine-tuning the fire pit edges.
Fireproofing & Structure Tools:
- Level – Ensures the fire pit base is even and stable.
- Measuring Tape – Helps with accuracy when planning pit dimensions.
- Metal Rake – Clears out leaves and spreads gravel or sand for fireproofing.
Fireproof Materials & Containment:
- Fire Bricks or Stones – Creates a safe and durable fire ring.
- Metal Fire Ring – Helps contain the fire and extends pit longevity.
- Gravel or Sand – Adds a fire-resistant base to prevent uncontrolled spreading.
Fire Safety & Maintenance:
- Bucket of Water or Sand – Essential for fire safety and extinguishing.
- Fire Poker or Tongs – For safely adjusting logs while burning.
- Gloves (Heat-Resistant) – Protects hands when handling hot materials.
Extra Tools for Cooking Fire Pits:
- Campfire Grill Grate – Great for placing over the fire for cooking.
- Dutch Oven or Cast Iron Pan – Ideal for campfire cooking.
- Long-Handled Tongs – Helps manage food or firewood safely.
These tools will make building and maintaining a campfire pit safer and easier while ensuring a great outdoor experience. Need help with fire pit designs? 🔥🏕️😊
Step 1: Choose the Right Spot: How to make a Campfire pit
Finding the perfect location for your campfire pit is crucial. Look for a flat, open area away from low-hanging branches, dry grass, and your camping gear. Ensure there are no fire restrictions in the area, and always prioritize safety.
Step 2: Gather Your Materials: How to Make a Campfire Pit
Creating a campfire pit doesn’t require a degree in construction; it just needs a bit of creativity and resourcefulness. Here’s what you’ll need:
- Rocks or Stones: Collect a variety of medium to large rocks or stones. These will form the foundation of your fire pit and provide a barrier to contain the flames.
- Shovel: A basic camping shovel will help you clear the area and dig a shallow pit. If you don’t have one, get creative – a sturdy stick or your hands can also do the job.
- Water Source: Have a bucket of water or a hose nearby for safety. This is your quick response to extinguish the fire if needed.
Step 3: Design Your Pit: How to make a Campfire pit
Now comes the fun part – designing your fire pit. Arrange the rocks or stones in a circular formation, leaving a gap for air circulation. You can create a simple ring or get artistic with different shapes. The key is to ensure stability and safety.
Step 4: Dig the Pit
Use your shovel or improvised digging tool to excavate a shallow pit within the circle of rocks. The depth will depend on the size of your rocks, but a few inches should be sufficient to contain the fire.
Step 5: Add a Base Layer
Line the bottom of your pit with a thin layer of sand or small pebbles. This helps with drainage and prevents the ground from scorching.
Step 6: Ready, Set, Fire!
With your pit in place, you’re ready to start a campfire. Follow our guide on “How to Create a Campfire” to fill your newly crafted pit with the warmth of dancing flames.
After you have the fire built try these recipes out: 5 irresistible Mouth-watering Campfire Desserts and 3 Irresistible Campfire Pizza Ideas
Conclusion:
Congratulations! You’ve just created the heart of your camping haven – a personalized campfire pit ready to host countless stories, marshmallow roasts, and moments of connection. As you gather around the flickering flames, know that your handcrafted pit has added a touch of magic to your outdoor experience. Enjoy the warmth, the company, and the beauty of a well-made campfire pit under the stars. Happy camping!
1. The Joy of Cooking Outdoors
Cooking over a campfire brings a sense of adventure and connection to nature. It’s a communal activity that brings people together to share a meal and enjoy the outdoors.
2. Versatility of Campfire Cooking
Campfire cooking isn’t limited to savory meals. You can bake bread, make desserts like s’mores and campfire cakes, and even prepare hot beverages like coffee and tea.
Cooking over a campfire brings both challenge and excitement to meals—whether you’re a seasoned camper or a newbie! 😊
Affiliate Disclaimer:
This website may contain affiliate links, which means that we may earn a commission if you click on a link and make a purchase. However, the inclusion of affiliate links does not influence the content, recommendations, or reviews provided on this site. Our primary goal is to offer valuable information and resources to our readers.
